
A plaster wall isn’t ready for printing just because it looks finished. Before printing on plaster walls, the surface needs to be sound, clean and even, with preparation matched to its condition. Texture, repairs and paintwork can all affect the clarity of the finished image.
Plaster can be mistaken for plasterboard, but the distinction matters when planning preparation. A professional assesses the wall’s construction and condition, addresses imperfections and prepares the surface for a crisp, consistent result. This guide explains what affects print quality and how direct-to-wall printing works, so you know what to expect before the project begins.
Key Takeaways
- Professional preparation is tailored to the wall’s condition, helping create a consistent surface for the print.
- Minor flaws and uneven areas can influence the finished image, so their treatment forms part of the preparation plan.
- The plaster’s surface and texture affect how well the print appears; understanding the substrate helps set realistic expectations.
- Print longevity depends on the surface and the finished installation, so consider these factors when planning wall art.
How professionals prepare and paint a plaster wall for printing
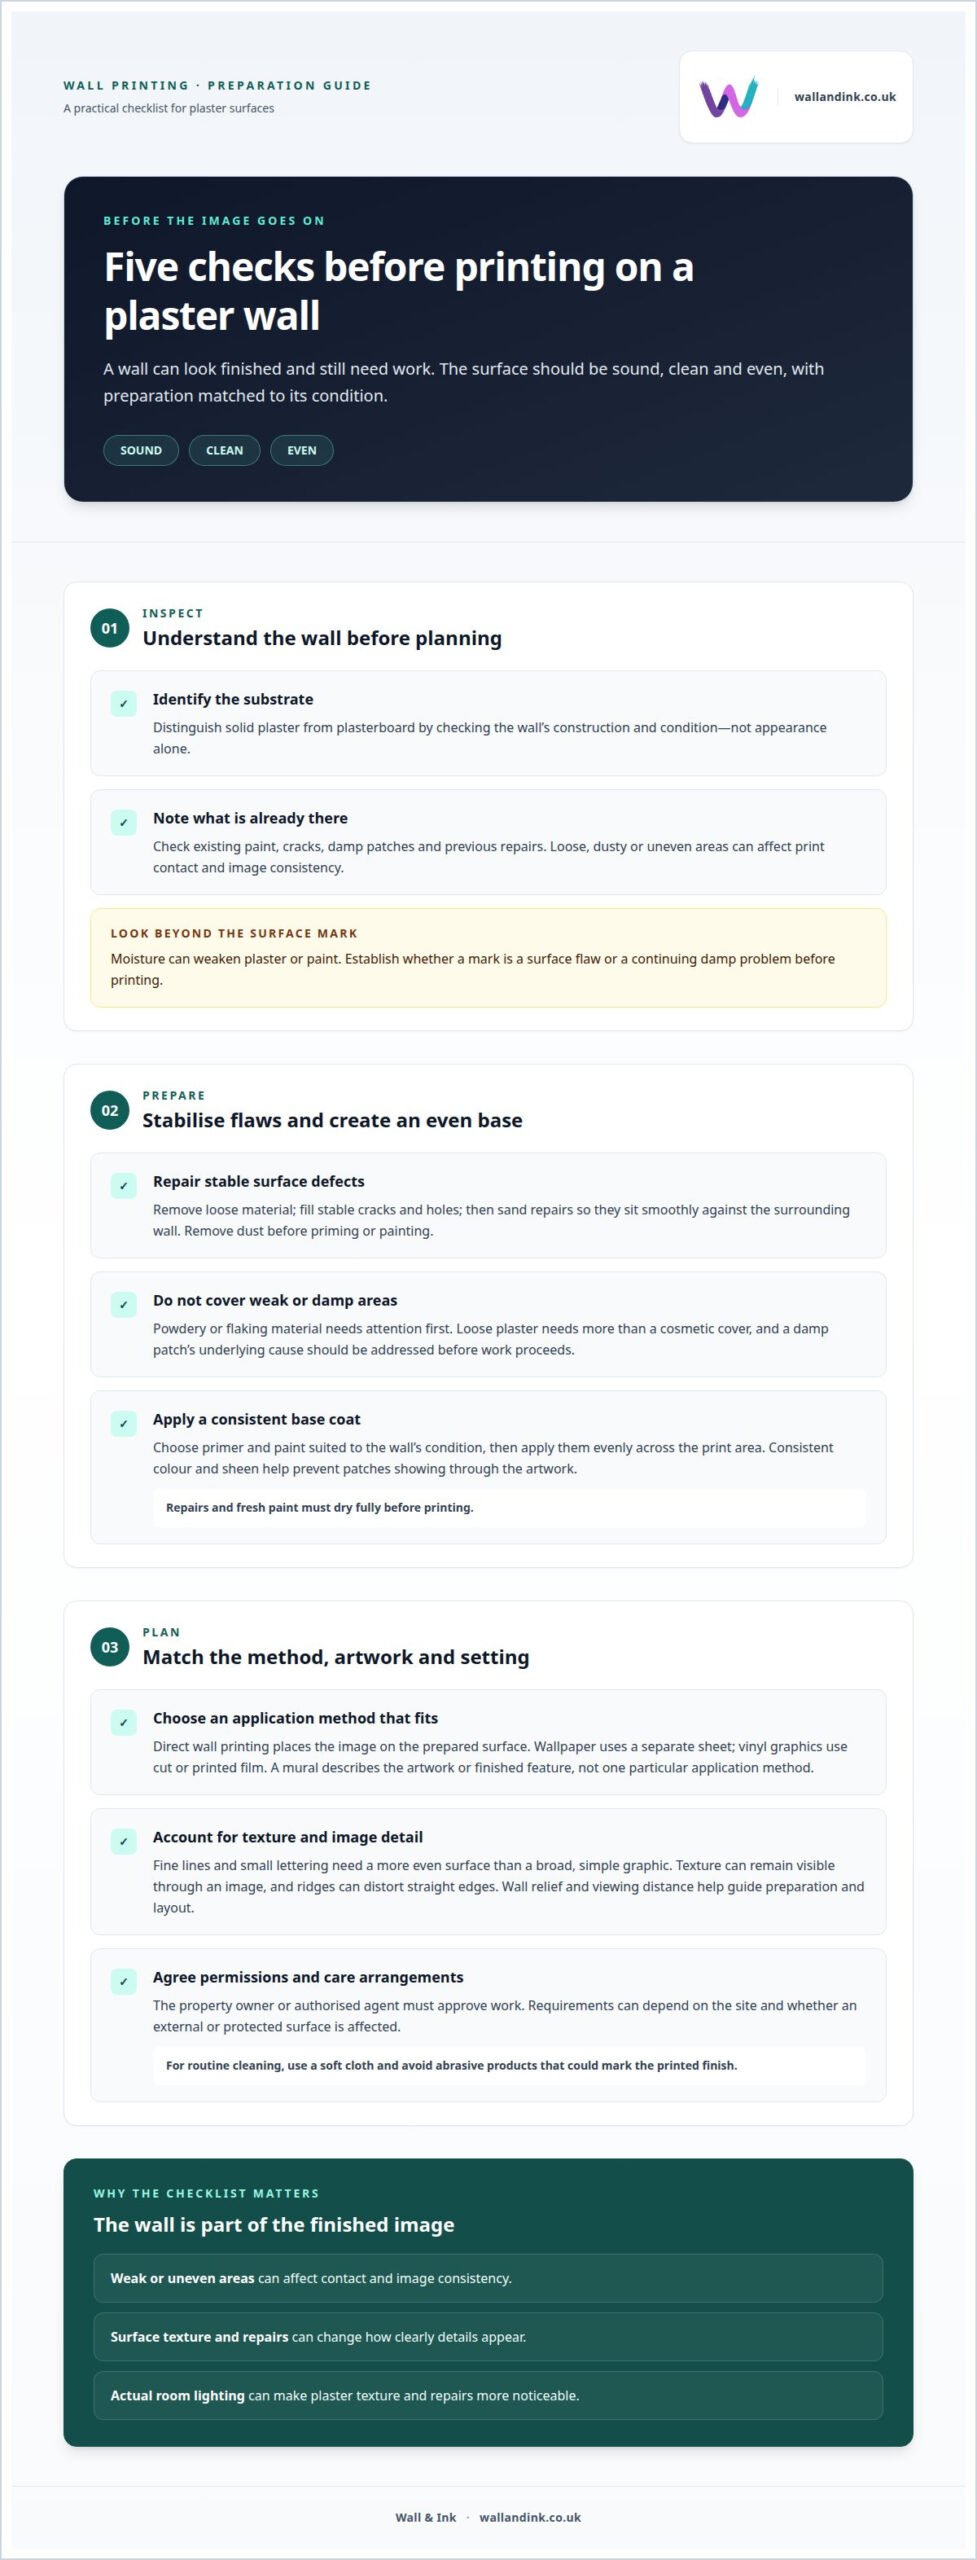
- Identify the substrate before planning the print. A professional distinguishes solid plaster from plasterboard by checking the wall’s construction and condition, not just its appearance. For printing on plaster walls, this matters because loose, dusty or uneven areas can affect contact and image consistency. The assessment also notes existing paint, cracks, damp patches and previous repairs.
- Resolve surface problems before painting. Remove loose material, fill stable cracks and holes, then sand repairs so they sit smoothly against the surrounding wall. Remove dust before priming or painting. Powdery or flaking areas need attention first: coating over them can leave a weak layer beneath the printed image.
- Prepare an even base coat. Choose a primer and paint suited to the wall’s condition, then apply them evenly across the print area. Consistent colour and sheen help prevent patches showing through the artwork. Repairs and fresh paint must dry fully before printing, so the surface is ready to receive the image cleanly.
- Choose the application method to suit the result. Direct wall printing places the image on the prepared surface; wallpaper uses a separate sheet, while vinyl graphics use cut or printed film. A mural describes the artwork or finished feature, not one particular application method. The wall’s texture and the design’s detail help determine the right approach.
- Agree permissions and care arrangements before commercial work starts. The property owner or authorised agent must approve work on the wall. Requirements can depend on the site and whether the work affects an external or protected surface, so establish the relevant permissions for the location before installation. For routine cleaning, use a soft cloth and avoid abrasive products that could mark the printed finish.
How professionals handle imperfections in prints on plaster walls
- Assess the defect and identify its cause before printing. Moisture can weaken plaster or paint, while cracks and loose areas can disrupt the image and damage the finish. A professional distinguishes surface marks from signs of a continuing damp problem. Printing over an unstable or damp area risks an uneven result and further deterioration.
- Compare visible flaws with the artwork. A shallow undulation may alter the appearance of a printed line, while a crack crossing a face or logo can interrupt important detail. Consider the wall’s texture, the image’s scale and the viewing distance. This helps reveal which marks will remain visible and which areas need attention first.
- Correct defects that could compromise the image. Fill or smooth stable holes, ridges and old repair edges, then allow them to dry before printing. Loose plaster needs more than a cosmetic cover. If a damp patch remains, address its underlying cause before work proceeds rather than hiding it beneath paint or artwork.
- Adapt the artwork and layout to the surface. Fine detail across pronounced texture may appear less defined than the same detail on a smooth area. Adjusting the position or scale can help the design work with the wall’s contours. For example, keep key text clear of a visible crack.
- Review the finished image under the room’s actual lighting. Side lighting can make plaster texture and repairs more noticeable than direct light. The professional checks whether a mark is part of the substrate, a print variation or a lighting effect before deciding on a remedy. For a planned direct-to-wall printing project, this assessment helps set clear expectations about the surface and image.
What types of plaster are suitable for wall printing?
- Classify the plaster before assessing suitability. Gypsum plaster is common on interior walls and can provide a smooth base when sound and properly finished. Lime plaster is often found in older buildings; its surface may be softer or more textured. Cement-based render is used on some exterior walls and can have a coarser finish. The plaster type alone doesn’t determine print quality.
- Check that the surface is firm and consistent. Look for powdering, flaking, hollow areas and previous repairs. A gypsum wall with a hard, even finish differs from one where the skim coat rubs away. Loose material can interfere with adhesion and image consistency, so the condition of the outer surface matters as much as the underlying plaster.
- Match the texture to the image detail. Fine lines and small lettering need a more even surface than a broad, simple graphic. A textured lime finish may remain visible through the image, while pronounced ridges can distort straight edges. The professional considers the artwork, viewing distance and wall relief before deciding how to prepare the area.
- Check moisture and coatings on every type of plaster. Dampness, salts or lifting paint can signal an unstable base. Identify these issues before printing rather than covering them with the image. Painted plaster also needs assessment: a sound coating behaves differently from chalky or peeling paint, which may separate from the wall.
- Consider the location as well as the material. Interior gypsum plaster and exterior cement render face different conditions, so preparation and printing must suit the setting. A sheltered indoor wall may retain a smooth finish, while an exposed rendered wall can show more texture and weathering. Assess the actual substrate, not just the name used for the plaster.
How long does printed wall art last on plaster?
- Start with the plaster’s condition, because the print depends on its base. Sound, well-bonded plaster supports a more stable finish than powdery or flaking material. A printed image cannot stop an underlying crack, loose skim coat or damp patch from worsening. Surface preparation and wall stability therefore affect how well the artwork stays intact.
- Consider the room’s exposure when planning for longevity. A hallway wall beside a busy route faces more knocks and scuffs than a feature wall in a quiet room. Direct sunlight, frequent contact and damp conditions can also affect wall art. The intended location helps guide preparation and design choices for a lasting result.
- Consider the print method and finish together. Direct-to-wall printing applies the image to prepared plaster, so the surface condition remains important. Image detail, colour coverage and texture affect how marks or wear appear. For example, a light scuff may stand out more against a solid dark area than within a textured, multi-coloured design.
- Protect the image with suitable everyday care. Avoid abrasive cleaning and harsh scrubbing, which can mark the printed surface. Keep furniture and equipment from rubbing repeatedly against the wall. Deal with spills or marks promptly using a gentle approach suited to the finish. Regular visual checks can help you spot damage early.
- Review changes to the wall before arranging repairs. A new crack, peeling paint or moisture mark points to a substrate issue, not simply print wear. Addressing the underlying cause protects the wall as well as its artwork. A professional assesses the affected area and determines whether local repair or a broader reprint is appropriate.
Planning a wall print for a plaster surface? Discuss your wall-printing project and the conditions affecting its long-term appearance.
Wall & Ink
Wall & Ink turns plaster walls into considered printed features, from surface assessment to the finished image. Its Direct-to-Wall Printing service applies artwork directly to walls, making it a practical option when you want a design integrated with the space rather than a separate panel.
For a home, Residential Wall Art can create a tailored focal point. Commercial Wall Murals and School and Educational Murals suit business and learning environments. The wall’s condition, texture and location inform preparation and design, helping the image work with the surface and its intended use.
Share details about your wall and the artwork you have in mind with Wall & Ink to discuss your project’s next steps.
Plan your wall’s next stage
Once you’ve decided what the wall should do for the room, align the artwork with its setting. A reception area graphic has different demands from a home feature wall. Consider scale, viewing distance and the atmosphere you want to create. That turns printing on plaster walls into a considered design decision, not simply a surface treatment.
Wall & Ink offers Direct-to-Wall Printing, Commercial Wall Murals and Residential Wall Art. Share the wall’s location, its condition and the result you have in mind to start a practical conversation about your project. Contact Wall & Ink about your wall, and take the next step towards a design that feels right for your space.
Wall & Ink for Printing on Plaster Walls
Wall & Ink provides Direct-to-Wall Printing for plaster walls. Once you’ve decided a printed wall suits your space, the next step is to discuss the design and surface preparation.
Services include Commercial Wall Murals, Residential Wall Art, School and Educational Murals, Retail and Hospitality Graphics, and Exterior Wall Printing. Choose the option that suits your setting and the kind of wall printing you have in mind.
Frequently Asked Questions
Quick check: is it plaster or drywall?
Plaster is a coating applied over a solid backing or laths, while plasterboard is a manufactured board fixed to a frame or wall. A visible board edge at an opening, such as a socket or doorway, can help identify the construction. Older properties may have lath-and-plaster walls; newer interiors often use plasterboard with a skim coat.
So how does it work?
A specialist vertical printer transfers a digital design directly onto the wall. The artwork is prepared for the surface, then the printer moves across the wall, applying the image in controlled passes. Unlike a separate printed panel, the design sits on the wall itself. The result depends on the wall’s condition, texture and colour, as well as the artwork’s detail.
Can you print directly onto plaster walls?
Yes, a professional can print directly onto plaster when the surface is suitable and properly prepared. It should be stable, clean and free from active moisture or loose coatings. For example, firm painted plaster can provide a practical base, while crumbling or damp plaster needs attention first. The wall’s texture also affects how fine details appear.
How should a professional prepare a plaster wall before printing?
A professional assesses the wall, identifies loose or damaged areas and plans preparation around the finish and artwork. For example, a previous repair may need levelling to prevent a visible change beneath the design. The surface must be clean and stable, and any new coating must dry before printing. This helps avoid trapping dust or moisture beneath the image.
What equipment and inks do professionals use for printing on plaster walls?
Wall printing uses a specialist vertical printer and UV-cured inks. The printer applies the image directly to the wall, while ultraviolet light cures the ink during the process. Wall & Ink uses this equipment for custom wall designs. The setup and image preparation depend on the artwork and surface, including whether the plaster is smooth, textured, painted or dark.
What is the professional process for printing a design on a plaster wall?
The process starts with the design and the wall, not simply the printer. A professional discusses the intended artwork, assesses the surface and prepares the image for the space. A digital visualisation can show how the design will look in the room before installation. Once the wall is ready, the printer applies the image directly, creating a finished mural on the plaster surface.